I swear every time I blog I have to apologize for it being so long. I'm not quite sure who it is I am apologizing to, I suppose it's myself more than anyone since it's my own life record; an online diary of sorts. I Pinterest and look at so many crafty teacher blogs and think to myself, "How can they do it?".... I mean seriously, how can they do it? Most people also have kids. I can't seem to find time outside of school work to write down all of the things and moments that I don't want to forget. To all of you who manage to do this, I salute you! Tonight I am putting grading and my classroom aside and doing some "fun" stuff (aka playing the game of procrastination).
Now onward to today's post, a wedding craft! It's getting so close! You want numbers you say? Try 157 days or 5 months, 5 days, 22 hours, 52 minutes from this exact moment. Truthfully, it is all making me a bit nauseous and I am ready for it to be here. After 2 years of planning I feel like I am running out of creative steam. There is good news; so many things are DONE. Lets make a list, lists always make me feel better.
Things that are done:
Venue
Preacher Man
Cater
DJ
Cake
Favors
Table Decor (almost, so close it's going on this list for my sanity)
Honeymoon night is booked
Photographer
Hotel Blocked
3 out of 5 Bridesmaid dresses ordered/shopped for
Things that need to be done:
Song list for DJ
Cake choice needs to be made
Final tasting with cater
Flowers
Bridal Party Gifts
Parent Gifts
Alcohol needs to be purchased
Final payments to be made
Mens Attire
Whew, what a list. I am sure that I have forgotten things on both ends of the to-do's and the have-done's.
Over the weekend Grant and I managed to get a few things made. We worked on creating our table numbers. Overall we have a vintage theme going on so when I found slate roofing shingles a few weeks ago in an antique mall I knew that I could find a purpose for them and somehow turn them into table numbers. For $2 a piece I couldn't turn them down. They were also fairly large, 18 x 9 so I was able to cut them into four 9 x 4.5 inch rectangles so I got 4 times the bang for my buck. Here they are all stacked up ready to be cut. Sorry for the crummy pictures. It was a last minute decision to capture it all so the iPhone had to do the trick.
Step 1 was using a chalk line to mark off where to cut.
2. After they were cut they had to be washed up and laid out to dry.
Our little slate houses.
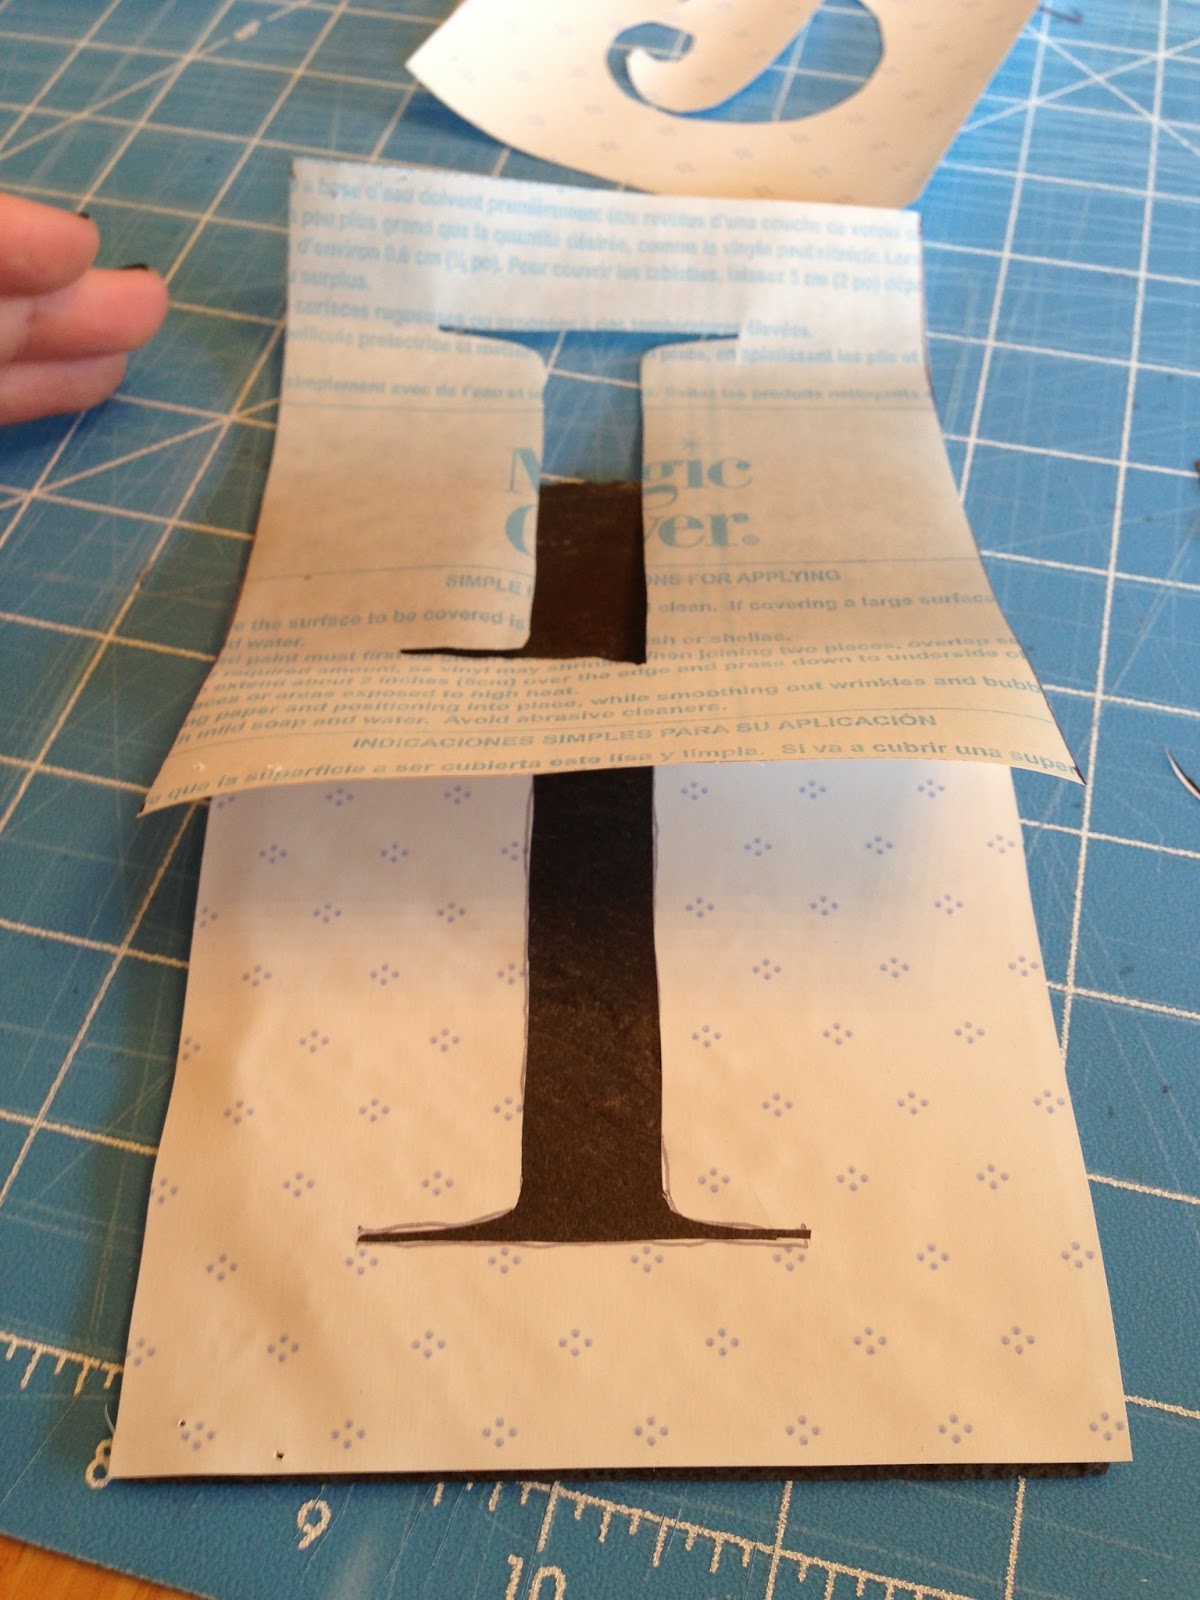
Next I used contact paper to cut out a stencil. To do this I printed off the numbers to the size that I wanted on regular printer paper. I suggest not using anything that is to narrow or curly as those curls can be hard to cut out. After we had all of our numbers printed out we laid them over the contact paper (sticky side down, with the covering still on) and used a razor blade to cut out the numbers. Doing this gave us a stencil that wouldn't wiggle around and that we could place once and leave until we were done.
Here is Grant placing the stencil.
Sticky side goes down, you know that already of course! Make sure to really press down the edges so that the paint does not bleed through.
Start applying thin coats of paint. Layer coats of paint until you get the desired color that you are looking for.
Notice our edges are not perfect. That's ok with me as it goes with the look we are going for but I am wondering if there is a way to get better results. I think that because the slate is bumpy a perfect seal did not form between the contact paper and the slate. Experimenting with a different type of paint might achieve different results. I used an acrylic paint but I am wondering if light coats of spray paint would work well and then you would skip the bleeding. Just food for thought.
I am so excited to see these put together with everything else. It will be here before I know it!
Update: SO I decided to try the spray paint idea. SOOOO much easier and faster. Turned out much nicer as well. See :-)
The numbers are much more crisp and instead of spending an hour to apply several coats of paint it just took one go around of spray paint and all of 5 minutes to do. I would highly suggest this version over the hand painting.


Oh MY GOODNESS I'm so seriously freaking obsessed with this!!!!! I totally want you to guest blog this if you don't mind! I LOVE IT! Also love that it matches the new blog layout which I love
ReplyDeleteThanks Becca! I would love to. Now you just have to be around for the crafty things to take pictures so that I have some decent ones, haha!
ReplyDelete